Tuesday, September 19, 2017

The Process of Commissioning a Painting

I have been receiving a lot of welcomed inquires about having a custom work of art created. Today, I wanted to share with you questions you should ask yourself when considering having a painting made and more information about the process of commissioning a painting by me.

Questions You Should Ask Yourself When Considering Commissioning a Painting

What do I want painted?
It seems like an obvious question but it is important to know what you want me to paint. This can be anything that has specific meaning to you. However, some people prefer to allow me to come to their location and get inspired by my surroundings and allow me complete control of the painting's subject matter. Below are some ideas for commissioned paintings:
  • Landscape
  • Pet portrait
  • House portrait
  • Favorite vacation photograph
  • Show hot rod
  • Farm equipment
  • Floral bouquets 
What is my budget?
Commissioning a work of art is an investment. The imagery you want painted probably has significant meaning to you (or your recipient) which is why you want to commemorate it with a one of a kind work of art. As such, I will spend 25-60 hours creating your painting to ensure I capture both the physical and emotional aspects of the imagery to the best of my ability. Your budget will determine the size (which depends on the amount of detail) and framing.

The Process of Commissioning a Painting

First, clients will either talk to me in person or fill out the fine art commission contact form on my website. From there we will meet to discuss your idea and I can come photograph the landscape, animal, truck, or tractor that will be rendered.

After I have reference pictures I will then be able to provide you with a commission agreement contract that will have a more accurate price dependent on the amount of detail to be rendered and framing preferences. The signed contract and a deposit of 50% of the painting is due before I begin.

If the client grants me permission to share behind the scenes progress on social media, they will be able to see me working their painting. If the work of art is a surprise, I can also send updates privately.

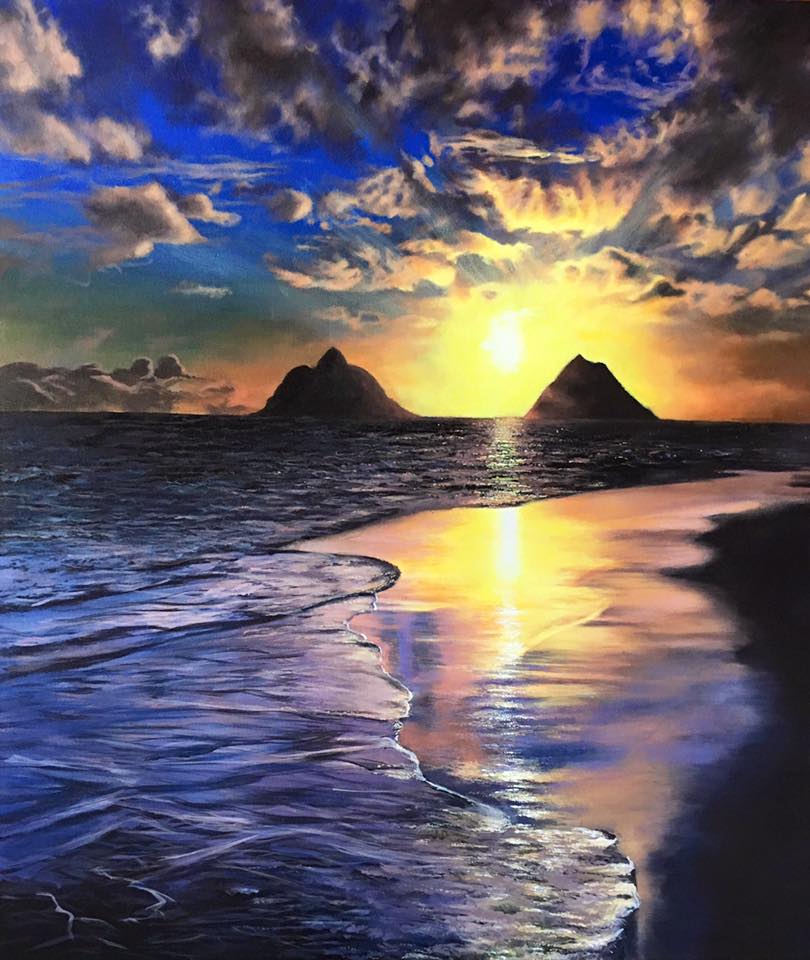
Below are some commissions from this year. Click each image to enlarge


"One of a Kind" - 8" x 10" - Acrylics on Gessobord by Kimberly English © 2017 - SOLD


"Sun-Kissed Abby" - Acrylics on Gessobord - 8" x 8" by Kimberly English © 2017

To start the commission process, click here

Tuesday, September 12, 2017

Painting Progression: Sun-Kissed Abby

Last week I finished a commission of a sweet chocolate labrador, Abby. This painting is a special anniversary gift and I had so much fun painting her! I was contacted by the client about a month ago when I had just finished painting "January Blossom". It was perfect timing as I was in-between projects!

We discussed what she wanted and set up a time for me to come photograph Abby. When I was photographing her, we had a comical time trying to keep her still. She is super spunky! We coaxed her to cooperate with some treats and sweet talk. She reminded me so much of my late yellow labrador, Buffy.

Below is the painting progression video of "Sun-Kissed Abby"


"Sun-Kissed Abby" - Acrylics on Gessobord - 8" x 8" by Kimberly English


If you are interested in having a custom pet portrait created, click here for more information.

Sunday, September 3, 2017

Finished Live Event Painting: Rachel & David

This weekend I delivered the finished painting from Rachel & David Sickler's wedding. They had an absolutely perfect summer day for their home farm wedding. As a landscape painter that finds inspiration in the agricultural farms of South Jersey, this wedding was everything that I cherish.

I met with Rachel a couple of days before the wedding to see the ceremony site and discuss the elements that she wanted included in her painting. I took some reference pictures and I was also lucky enough to take some around their beautiful farm. The day of the wedding, I completed about 90% of the painting in just 7 hours. I brought the painting back to my studio to add finishing touches, varnish and a frame.

All of the details in her wedding were so personal and reflected her sweet, thoughtful personality. My favorite things to paint were the straw bales and Rachel's aisle decorations of milk cans and flowers. The texture and colors in the straw bales were so fun to create! I also loved how the milk cans were the same color and shape as the silos. I added these after the wedding and I believe their placement really helped to solidify the composition.

The most difficult parts to paint were the silos. I tried to work on them at the wedding but I quickly decided that it would be best to paint them in my studio where I had more control to create the perspective of their round shape. As in previous wedding paintings, the hands and faces were a challenge since they were extremely (smaller than the size of a dime). However, I enjoy this challenge by using as few strokes and shapes as possible.

It was such a pleasure to work with Rachel and create their wedding painting! It was an honor to be a part of their special day at such an amazing farm. I wish them many years of married bliss with all the blessings that it will bring in the years to come.


Below are pictures of the progression as well as the final painting and Rachel's review of the experience. Click the pictures to enlarge.


With my very good friends, Steve & Kathy Williams

Picture courtesy of Taylor Dubois-Bill


Rachel & David's Live Wedding Painting

"After watching Kim do a live painting at my friend's wedding, I knew I had to have her for our wedding. Kim came with high recommendations from the bride and after seeing the finished product, I knew I had to have her! Kim was super kind, thoughtful, and very professional throughout the entire process. It is evident she is passionate about what she does.

Since the wedding was at our house, Kim stopped beforehand to view the property and how everything would be set up. She took some pictures and noted details I thought I would only notice. Her excitement to paint at our wedding was clear and made it even more enjoyable to work with her.

Kim took no time at all presenting us with the final product which was wrapped and displayed beautifully in a handcrafted wooden frame. I cannot wait to display this timeless, beautiful work of art for years to come and perhaps pass on to future generations. If you are looking for a unique experience for your guests at your wedding in addition to receiving a beautiful painting, look no further than Kim English Art!"

-Rachel Layton Sickler


If you are getting married or would like to gift a couple a live event painting at their wedding, 

Tuesday, August 29, 2017

Sharing Another Artist: Lori Gilbert

This week I wanted to share another artist: Lori Gilbert. I have been following Lori for a couple of years on Instagram and I am totally inspired by her artwork and lifestyle! She is a professional self taught acrylic painter who specializes in large, photorealistic ocean waves and sunsets. "Lori’s art is inspired through a complex web of internal and external factors. Love for the natural universe is inspiration for many of her pieces and emotional intellect adds a sometimes seemingly dark edge to her work which never fails to capture the viewers full attention."

I admire Lori's commitment to her artistic practice as well as using her personal fitness to fuel her creativity. She spends most her day painting in her studio using simple artistic materials such as Liquitex acrylics, styrofoam plates, and her favorite $4 paint brush from Michael's to create her works. She successfully uses dramatic color shifts and organic shapes to create the illusion of flowing water and soft clouds in her paintings. I am enamored by her ability to paint on such a large scale and create captivating visual effects.

Lori also credits regular workouts to helping her sustain and expand her creativity. I was inspired through following her regularly on social media that I have also incorporated fitness into my daily routine to help cultivate new creative energies. I have to admit, it does work! I feel even more motivated and inspired after I have had time to workout. Having the time to put your body to work also provides to opportunity for your mind to become more clear and think in different ways.

Below are some of my favorite works of art by Lori.


Be sure to follow Lori with the links and contact information below

Facebook: https://www.facebook.com/Lori.Gilbert.Art/
Instagram: https://www.instagram.com/lorigilbertart/
Blog: https://lorigilbertfineart.com/blog/
Website: https://lorigilbertfineart.com
E-mail: lgilbert756@gmail.com

Tuesday, August 22, 2017

Art Materials & Ideas to Encourage Artistic Development

Today's blog post is a follow up post from last week's Experiencing Lowenfeld's Stages of Artistic Development with Children in Your Life. Please refer to the previous post for the descriptions of each artistic stage of development. Below are some examples of materials and ideas to encourage the child(ren) in your life at their current phase of artistic development:

Scribble Stage (Ages 2-4)
Use materials that allow the child to choose different colors and experience different mark making. Encourage the child to talk about their creations. In the beginning their drawings may not mean anything until they reach the later portion of the scribble phase known as "Naming".

Art materials:

  1. Large crayons
  2. 12" x 18" or 18" x 24" paper for drawing and painting to capture large movements
  3. Large painting brushes with thick handles for easy gripping
  4. Tempera paint
  5. Air dry clay/ play dough for sculpting
Ideas to Explore:
  1. Allow the child to draw freely
  2. Ask the child what their drawing represents


Pre-Schematic Stage (Ages 4-6)
Encourage the child to make connections from their experiences in the world and their artwork

Art Materials:
  1. Large crayons
  2. 12" x 18" or 18" x 24" paper for drawing and painting to capture large movements
  3. Large painting brushes with thick handles for easy gripping
  4. Tempera paint
  5. Watercolors
  6. Colored chalk
  7. Construction Paper
  8. Glue
  9. Air dry clay/ play dough for sculpting
Ideas to Explore:

  1. Size Relationships
  2. Feelings
  3. Body Parts

Schematic Stage (Ages 7-9)
Allow children to draw/create what they want with new art materials. Encourage them to depict natural and imaginative environments.

Art Materials:
  1. Multimedia Paper
  2. Paint Brushes
  3. Tempera Paint
  4. Watercolors
  5. Graphite Pencils
  6. Colored Chalk
  7. Oil Pastels
  8. Paper Mache
  9. Construction Paper
  10. Glue
  11. Clay
Ideas to Explore:
  1. X-Ray Pictures
  2. Front and Profile Views 
  3. Emotions
  4. Experiences in their world (going to school, dance practice, etc.)
Dawning of Realism Stage (Ages 9-11)
To encourage children to develop their artistic skills, have them draw from observation and explore other art mediums to express themselves and illustrate the way they view the world.

Art Materials:
  1. Multimedia Paper
  2. Paint Brushes
  3. Tempera Paint
  4. Watercolors
  5. Watercolor Pencils
  6. Graphite Pencils
  7. Colored Chalk
  8. Oil Pastels
  9. Paper Mache
  10. Construction Paper
  11. Glue
  12. Clay
  13. Print Making Materials
  14. Book Making Materials
  15. Photography
  16. Weaving
Ideas to Explore:
  1. Art from around the world
  2. Drawing from observation
  3. Elements and Principles of Art


Tuesday, August 15, 2017

Experiencing Lowenfeld's Stages of Artistic Development with Children in Your Life

While I was studying to become an art teacher, I was required to take many child and adolescent development classes since I would certified to teach grades K-12. In these classes we discussed the physical, emotional, and social growth that happens within childhood and how it will affect learning in a classroom setting. In my art education classes we also learned about a different type of child development: The Stages of Artistic Development by Viktor Lowenfeld. Today I am going to briefly describe these stages so you can better understand the ways in which children begin to express themselves visually.

The first stage is the Scribble Stage which occurs when children are between 2-4 years of age. In this stage children begin by scribbling their kinesthetic motions onto paper (and sometimes walls). In the late portion of this stage, children begin to name or tell stories about their drawings. This is the shift from the kinesthetic thinking to imaginative thinking with the ability to visualize pictures.

Children then move into the Pre-Schematic Stage when they are approximately 4-6 years of age. This occurs when children begin to draw images that represent either animal or human figures. They create connections with the shapes that they draw to objects in the physical world around them. The most important aspects of the subject are emphasized and the use of color is more emotional than logical.

The next stage of artistic development is the Schematic Stage which occurs when the children are about 7-9 years old. In this stage, shapes are assigned to objects and they are attempting to communicate with the images they create. Another important development is spacial awareness and the appearance of sky and ground relationships.

Children then move onto the Dawning of Realism stage when they are about 9-11 years old. Realism is more about the experience with the object rather than photographic representation of it. Drawings at this stage also have defined steps to the process. Enhanced understanding of space with the use of overlapping also appears. This is also the time in the development of children where self awareness appears as well as self criticism which can hinder the development of their artistic abilities.

The final stage of artistic development in childhood is the Pseudo-Realistic Stage which occurs when children are about 11-13 years old. In this stage, the product becomes more important than the process. They try to mimic the shapes and values that they see in the real world to create works of art that are ready for "stage presentation". Children will also make visual and emotional connections to the objects from the physical world through their drawings. 

Credit: Laurie E. Meyers showcasing Viktor Lowenfeld's Stages of Artistic Development


As a mother, I am now experiencing the beginning of Lowenfeld's stages with my oldest child, Courtney. She is currently in the Pre-Schematic Stage where she is beginning to draw things that represent people or animals. Below are some unprompted pictures drawn by Courtney. It is so much fun to listen to her talk about her drawings and what she is trying to represent with her creations. In a future blog post I will provide you with suggested art materials and ideas to share with your child to encourage their development in their current stage.


References

Clements, Robert D., and Frank Wachowiak. Emphasis Art: A Qualitative Art Program for Elementary and Middle Schools. Allyn & Bacon, 2010

“Lowenfeld's Stages of Artistic Development.” LOWENFELD, www.d.umn.edu/~jbrutger/Lowenf.html.

“Viktor Lowenfeld's Stages of Artistic Development.” Ms. Lewis' Art Stars, www.mslewisartstars.com/viktor-lowenfelds-stages-of-artistic-development.html.

Monday, August 7, 2017

Art Supply Unboxing: Ampersand Floater Frame

Today I wanted to share with my fellow artists and art enthusiasts a new product offered by Ampersand Art: The Floater Frame. I exclusively paint on Ampersand Gessobords and was ecstatic when they released their own line of frames! Their products have a beautifully smooth surface which allows me to paint meticulous details. I also love that they are made in the USA!

The floater frames are made from solid wood and come in three different finishes: white, black or maple. They also have two edge preferences: bold, which measures 3/8" wide and thin, which measures 1/4" wide. The 1-1/4" frame profile accommodates 7/8" deep artwork as well as 3/4" canvas or flat panels. The 1-7/8" frame profile accommodates 1-1/2" deep artwork (See pictures below). All of these options means they are perfect for framing every type of hard panel that Ampersand produces: Aquabord, Claybord, Encausticbord, Gessobord, Hardbord, Pastelbord, or Scratchboard. Currently, floater frames are available in these size: 8"x8", 8"x10", 11"x14", 12"x12" and 16"x20".

I purchased a black, thin 1/4" edge, 7/8" frame profile Ampersand Floater Frame from Amazon. I wanted to see the quality of the product and what was included before I bought in bulk. Below is the unboxing video of my first floater frame. I am thrilled with the quality of this product and the many options it features! I especially like the predrilled countersunk holes for mounting the artwork to the frame. I will definitely be purchasing more; however, next time I'd like to try the bold edge.


In the video I discuss the differences between the Illusions Floating Frames (which I was using previously) and Ampersand's new product.