Tuesday, January 31, 2017

Sharing Another Artist: Debbie Shirley

Today I thought I'd share with you one of my favorite acrylic artists: Debbie Shirley. I've been following her for a few years and to be honest I don't know how I came across her but I am so glad I did!  I have followed her for professional and personal inspiration. She is a mother of 3 boys and I admire her ability to balance everything so well.

When I first found her, she created smaller paintings which appealed to me since I also have a preference for creating tiny paintings. She now is expanding her portfolio to offer larger compositions. Debbie describes her style as "contemporary realism meets roadside retro". Her subjects include food, her son's toys/games, classic cars and retro neon signs. Her renderings are accurately executed with intriguing compositions and clever titles.

I really enjoy how she takes everyday objects or a roadside scene to create her beautiful works of art. She uses lighting and perspective to give ordinary objects and places a new life and personality. Below are just a few of my favorite paintings.


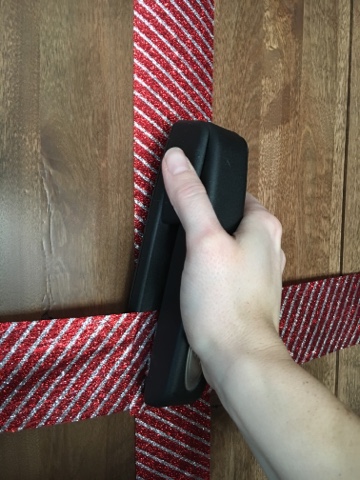
"62 Corvette" - 6" x 6"

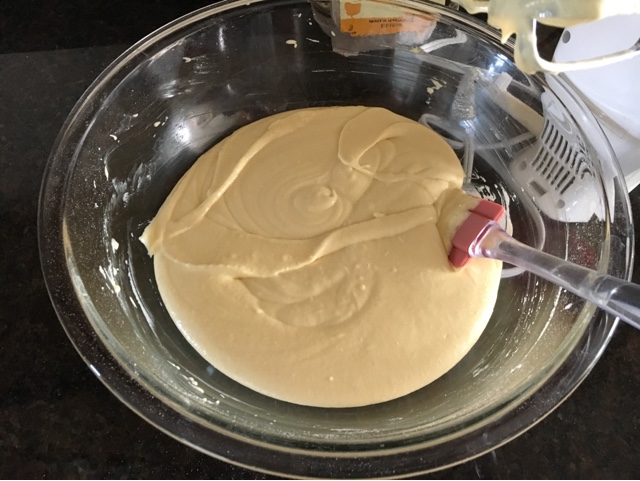
"Ying and Yang" - 5" x 7"

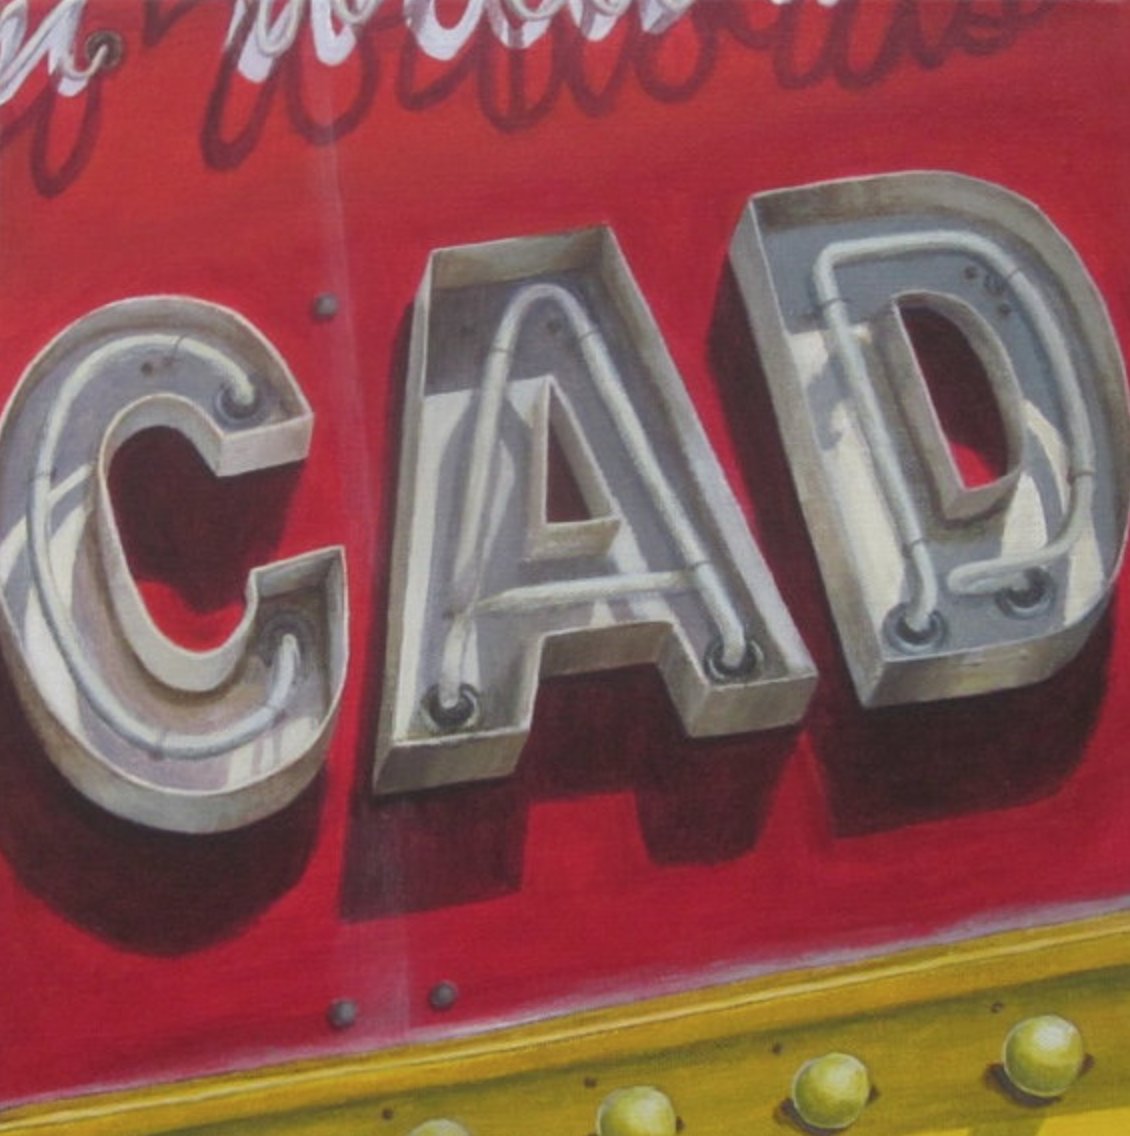
"Arcade" - 12" x 12"


To learn more about Debbie and her artwork, please follow the links below:

Website: http://www.debbieshirley.com
Facebook: https://www.facebook.com/DebbieShirleyArt/
Instagram: @debbie_shirley1
Etsy: https://www.etsy.com/shop/ShirleyPrints

Monday, January 16, 2017

Baking with Food Allergies

Food allergies are a topic I haven't blogged about but thought this post could be helpful to other families navigating them with their child(ren). My children are allergic to milk and eggs and are to avoid ingesting them which can make baking (and life in general) very tricky. Since I am breastfeeding my son, I am also on a restricted diet. I will write a post in the near future further explaining my children's food allergies and our journey living with them.

I discovered Vegan Egg a couple of months ago on Amazon and decided to give it a try. It is a powder that is mixed with water that you can cook and bake with like regular eggs. I started using them at breakfast because I missed having scrambled eggs. Surprisingly, they are pretty tasty! When my husband's birthday rolled around I wanted to try baking with them. And yes, not from scratch baking. I cheated this time and used a box cake as I was simultaneously making his favorite dish: lasagne and dairy free stuffed shells for the rest of us.


To make Vegan Egg, you whisk together 2 tablespoons of Vegan Egg powder and 1/2 cup of ice cold water. The box cake I was using called for three eggs so I mixed together 6 tablespoons of Vegan Egg and 1.5 cups of water. The picture below shows the consistency of the mixture. I have found that Vegan Egg has the closest viscosity and amount as regular eggs. Other egg replacers I have used often do not require as much water which can effect the recipe.


After I mixed the egg mixture, I continued to follow the recipe on the box for the remaining ingredients and baking instructions. I purchased my cake mix from Aldi's and it did not have any egg or milk within the cake mix. Below is a picture of the cake batter all mixed together.


The cake was delicious! It was very moist and reminded me of a thinner version of the pound cake from Stock's Bakery in Philadelphia. The best part was we could ALL enjoy the SAME cake. 


Thursday, December 22, 2016

Christmas Traditions

Only a few days remain before Christmas and I have been busy getting ready. My studio has turned into gift wrapping central and my Saginaw Watertown slide table has already proven very handy (click here to read more about it).

Growing up we would spend our Christmas Eve at my Aunt Ann's. She was always an amazing hostess with delicious dishes served on crystal platters and linen napkins. My Uncle Norman would serve us virgin cocktails in fancy glasses. We'd play shuffle board, darts and open our presents. They are such fond memories! 

When our daughter was born we started a new tradition. Every Christmas morning I make a large breakfast for my family. We feast on pancakes, scrapple, eggs, sausage, and pan fried potatoes. It's definitely a new favorite! After breakfast we exchange gifts and relax. Last year it was so warm we went for a walk in short sleeves!

What are some of your Christmas traditions? I'd love hear about them, please comment below!


Wishing you a very Merry Christmas!

Sunday, December 11, 2016

A Milkhouse Holiday Sale

Yesterday I participated in A Milkhouse Party's Holiday Sale. I had such a great time! I met a lot of great new people, saw some old friends and even made some new ones.

I was so excited to start using my new art show display (you can read more about it here) that I set it up in my dining room on Wednesday. I wanted to get acquainted with how all the parts worked and the best way to handle the large panels. I was pleasantly surprised at how easy it was to assemble. Below is a picture of my trial run.


I began setting up at the Milkhouse on Friday afternoon. I set everything up but due to my location being right in front of the back door, I had to open the panels to allow other vendors easier access. I had a great location and was glad to help out the fellow sellers! To avoid any mishaps, I labeled where everything would go and packed them up until the following morning. 

I always wake up super early when I have a big event and without fail I got up at 3AM. I used that time to finish last minute preparations and finish packing. I really enjoyed the quiet time before the kids woke up to get organized.

After getting everyone ready for the day, I arrived early Saturday morning to run electrical cords, close the panels and finish hanging things. My mom was nice enough to come help and give her expert staging advice. I ended up switching a lot of my display around to highlight my new products: Canvas prints and framed prints. 10 A.M. rolled around fast and after I scarfed down a Wawa gobbler bowl, I was ready to greet customers!


I had an amazing time meeting new people that live in the area. It's so inspiring to see people recognize the places that I paint or connect with the artwork personally with a memory. It's awesome to know so many people identify with farm life through the farm animals and landscapes that I paint. I truly enjoyed listening to all of their stories and sharing my own.

The day went by fast and my friend, Courtney, showed up to help me tear down. While I was going out back to get my truck, I was lucky enough to see a beautiful sunset.


Thank you to everyone who came to visit me and to those who purchased my artwork!

Saturday, December 3, 2016

10 Minute Christmas Card Holder

Now that our house construction and kitchen are finished, I finally have the opportunity to decorate this winter. What better way than with the beautiful Christmas cards we receive from family and friends? Here's a crafty post for displaying Christmas cards this holiday season and will only take about 10 minutes and about $3.00!

What you'll need:
  1. Stapler
  2. Ribbon (without wire)
  3. Scissors


1. First, wrap a piece of the ribbon around the cabinet door vertically and cut it to size.

2. Use the piece you cut as a template for the other cabinet doors you want to decorate (I was covering four cabinet doors, so I cut three more ribbons).

3. Next, wrap the ribbon horizonally around the cabinet door and cut it to size.

4. Repeat step 2 for the remaining cabinets' horizontal ribbons. 

5. Make bows using this method:


6. Wrap each cabinet with the ribbons and secure them using the stapler. I wrapped the vertical ribbon first then the horizontal ribbon. 

(Inside the cabinet door)

Note: I placed my horizontal ribbon right above my hinge so they would be the same height.


(Inside of cabinet door) 

7. On the front of the cabinet, attach the bow where the ribbons overlap. I stapled it in an inconspicuous spot inside the bow. Make sure you get under both ribbons and over the bow before attaching them. 


Viola! You're ready to display your family and friend's seasonal greeting cards. You can use clothespins or pins to attach them. I have some leftover mini clothes pins from my sister-in-law's bridal shower that I will be using. (You can read about it by clicking here)


Note: I left two cabinets without bows for variety and to maximize card displaying.

Saturday, November 26, 2016

My Newest Find: Saginaw Watertown Slide

Meet my newest find for my studio, an antique Saginaw Watertown Slide cabinet. I had been searching for one for almost a year and this piece has quite a story of how it made it's way to me.


After unsuccessfully locating one in my area, I took to the Facebook search bar (this is how I found my complete art show system, read about it here) Typing in "expanding cabinet table" brought up a lot of older posts. After scrolling through I found a post from the previous day of a cabinet for sale in Pekin, Illinois at a small shop called Corner Curio. I contacted the shop owner, Dawn, who was extremely helpful, and explained how I was interested in purchasing the cabinet but needed to figure out the logistics of getting it to New Jersey.

As some of you know, my brother, Brandon, lives just outside of Indianapolis and works for John Force Racing. I called him while he was racing in Pomona and asked if he would be willing to bring the cabinet home with him during his upcoming visit for Thanksgiving. He was able to bring it home but I had to get the cabinet to his house, about 3.5 hours from Pekin, Ill.

I was determined to obtain this long sought after cabinet. Luckily, I stumbled upon the television show "Shipping Wars" just a couple of weeks prior and learned about UShip.com. After registering and uploading information about the cabinet, I received bids on transporting the cabinet to Indiana.

I purchased the cabinet over the phone and secured the transporter, Mario. We discussed the details of the transaction and settled on pick up and delivery dates. Since my brother was racing in California and wouldn't be back to his house for almost a week, I got in touch with his neighbor, Michelle. She was going to help by accepting the shipment and storing it in her garage.

Unfortunately, due to prior engagements and differing time zones, Mario was unable to deliver the cabinet at the time we discussed. However, this worked out for the best! A couple of days later, Brandon was home and the cabinet was delivered.

The following week, my brother drove the 10+ hours home to stay with us to celebrate Thanksgiving. The cabinet was finally home! 

I can't wait to use it with my private lesson art students, packaging prints, and creating works of art. Below are pictures of this amazingly versatile piece of furniture. The best part of the whole story, is that it only cost $150!


Friday, November 25, 2016

Thanksgiving

Now I know almost everyone's favorite holiday is Christmas for the presents, lights and the beautifully decorated trees. But mine is Thanksgiving! There's something about getting the whole family together to enjoy delicious food and each other's company that can't be beat. There's no stress over buying gifts or wrapping them. Just the people you love the most giving thanks for all the blessings the past year has brought.


We enjoyed our garden's harvest with vegetables and fruit we grew earlier in the year. We had sweet potatoes, corn, green bean casserole, coleslaw (from my father-in-laws cabbage) and mashed potatoes (from our friend's potato farm). We even had raspberry juice that we harvested and froze to enjoy throughout the winter.

Below are some pictures from our Thanksgiving feast.